Adding non-teaching staff to a Conference
If you'd like parents to be able to book appointments with a member of staff that does not usually teach their child - such as the Principal, a trainee, or specialist teacher(s), etc - you need to set up a Custom Group. This links a teacher (or teachers) on your system to a selected group of students, so that when their parent logs in to book appointments they see that teacher pre-selected for them automatically.
Alternatively, where only a few appointments need the additional staff, you can follow this guide to add them into the relevant appointments: Changing Teachers on an Existing Appointment
If the staff member you want to use is not currently listed in your system, see step 3 below.
If you need to split a class - into those students that just see the class teacher and those that need to see that teacher and the extra teacher - create as many custom groups as are required to replace that class, then go to the Classes step of Configure Conference to add the custom groups to your evening, and untick the original class itself. Again, alternatively, you can follow this guide to add the extra staff into the relevant appointments: Changing Teachers on an Existing Appointment
Creating a Custom Group
- Go to Data > Custom Groups and click on Add Custom Group
 If you have already set up one or more custom groups this is also where you can edit them. Note that if you need to rename a Custom Group you will need to first delete it, and then recreate it with the new name. Deleting a group will not affect any existing bookings.
 - Enter a name for the group so you can easily identify it when you need to use it. Then click Change Teacher Membership and Change Student Membership to add or edit the teachers and students involved with the group - see below for more details.
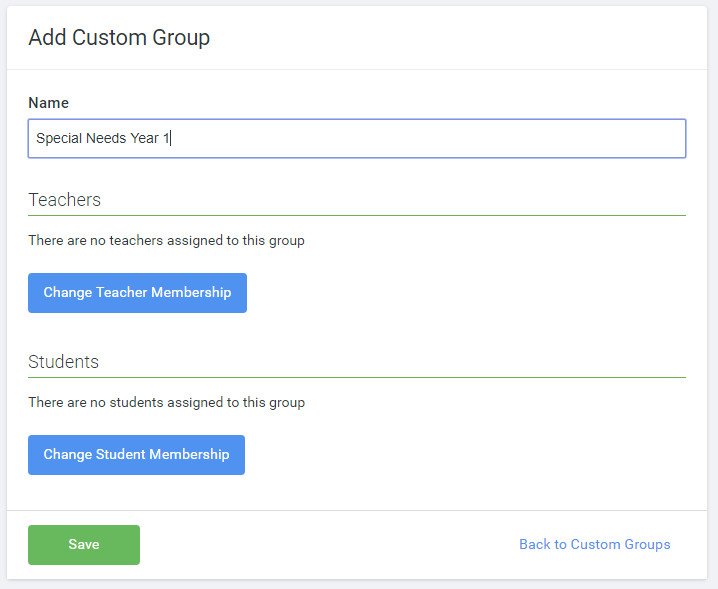
- Change Teacher Membership allows you to specify the teachers that will be assigned to the group. Choose the teacher(s) you want and click Update Membership.
 If the teacher you want is not listed, it means that they are not currently in your system and you will need to manually add them by following this guide: Manually Adding or Editing a Teacher
If you chose more than one teacher you can then specify that one is the Main Teacher - this will be the default one to take bookings when you use the custom group.
Where there is more than one teacher the group will act like a Shared Class and the options listed in the article on managing shared classes will be available when you are configuring your conference.
-
Change Student Membership allows you to specify the students that will be assigned to the group. Choose the combinations of students you want - this acts in exactly the same way as the students filter used when setting up a conference or event - then click Update Membership.

-
Finally click Save to save your group.
 If you have already set up one or more custom groups this is also where you can edit them. Note that if you need to rename a Custom Group you will need to first delete it, and then recreate it with the new name. Deleting a group will not affect any existing bookings.
 If the teacher you want is not listed, it means that they are not currently in your system and you will need to manually add them by following this guide:

Once your groups are created you can use them when creating new conferences, both in the student filter that defines who can log in to make bookings and (for conferences) as a class (the groups will appear underneath your normal classes in Configure Conference > Classes and need to be ticked to add them to an evening).