Manually Editing Classes
This article has been rendered mostly obsolete by the ability to create Custom Groups in the Parents Evening System.
Please refer to this article: Creating Custom Groups instead.
(If you need to split a class, create as many custom groups as are required to replace that class, go to the Classes step of Configure Evening to add the custom groups to your evening, and untick the original class itself.)
__________________________________________
If you need to manually add additional classes, or split a class between two teachers, this article will show you how to change the teachers allocated to individual students by adjusting and uploading a spreadsheet. This will only affect which teachers are available for new bookings - it will not affect existing bookings in any way.
1. Download Classes File
The first thing to do is download the existing classes file, which can then be adjusted. This is important as importing a new classes file will overwrite any existing classes so the file must contain classes for all students, even if you're only changing a small number of entries.
- From the Admin Homepage select Data from the left hand side to visit the Data Dashboard.
-
Click the Export Classes button from the middle of the page.
This will download a CSV file which contains a list of teacher linked to students via classes.
2. Update the Classes File
Note: The screenshots contain a class external ID column. You might not see this column if your classes haven't been synced through a school information system (SIS). If your original file doesn't contain it you do not need to create one.
- Open the CSV file in a program such as Microsoft Excel. Each line in the file details the allocation of one student to one teacher.

- Adjust the file by adding, editing or removing rows where appropriate. The spelling of the teacher's name and student's name/class must match exactly as they are set up on the system. We advise to copy/paste names rather than typing to avoid typos.
- To remove a student from a class, delete the row.
- To add a student to an existing class, insert a new row and copy a row of the class in question. Update the three student columns with the student's details.
- To add a new class altogether, such as "Extended Appointments", add a new row per student with the same teacher name and subject. The class code and class ID columns should be left blank.
- If you have a shared class with three teachers and looking to remove one teacher to leave two, find the rows for the specific class code and delete the rows for the one teacher only.
Note, you should use the settings under Configure Evening > Class Teachers instead you just wish to select a single teacher to take the class out of any of the assigned teachers.
- Save as a CSV file somewhere where you can easily find the file.

- Keep a copy of this file to hand in case you need to upload it again in the near future.
When the system is synced with an SIS, it overwrites any of these custom changes to the classes.


3. Importing the adjusted Classes File
Once you have updated and saved the file you are now ready to import this back into the system. Again, please note this will replace all classes in the system with what's in the spreadsheet. Therefore it should contain the classes for all students.
- From the Data Dashboard, click Classes Import and click on Choose file.
If you do not see this section you will need to turn on manual imports via Settings > Data Import Source > Allow Data to be Manually Imported.

- Click Next and follow the on-screen prompts.
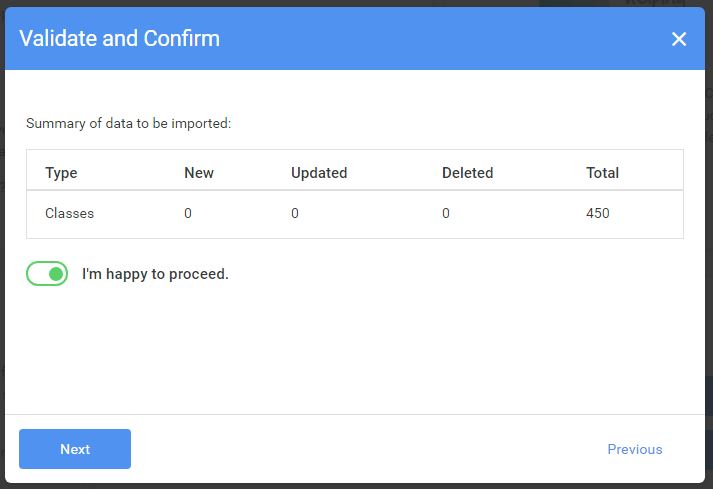
If any students or teachers cannot be matched with the data already on the system, the system will advise which rows in the spreadsheet contain errors. If this happens, please correct the data in the spreadsheet and re-import the file by clicking Previous to get back to the first screen and re-uploading the file before clicking Next. - You will be presented with a summary of the changes (if any) being made. Agree to these by clicking the I'm happy to proceed option and click Next.
- The data is then uploaded and confirmed. Click Done to be return to the Data Dashboard.


Syncing from your SIS
If the system is synced with an SIS, the classes which were manually imported under this guide will be overwritten with the classes from the SIS. Therefore keep a copy of the imported file to hand in order to import the file again following an SIS sync.